
Seasonal recipes are a home cook’s best friend with holidays just around the corner. It’s impossible not to love these special occasions! Not when it means more time spent eating and celebrating with friends and family. Who doesn’t have their go-to Thanksgiving dishes, Christmas food, Easter recipes, and St. Patrick’s Day desserts? But just because you’re cooking for a group of ten, doesn’t mean you have to spend more to make more.
Good thing we have affordable seasonal recipes for home cooks looking for alternative recipes that are as delicious as they are within reach!
Delicious And Affordable Seasonal Recipes

Thanks to our recipes, you can make the best seasonal dishes without splurging too much on ingredients. You can have both a delicious stuffed-turkey for Thanksgiving dinner and an exciting Halloween party with all kinds of Halloween-themed food.
In this article, we’ll show you how to cook staple seasonal dishes for all kinds of occasions all throughout the year. These special occasions include Thanksgiving, Christmas, Halloween, Easter, and even St. Patrick’s Day. But don’t worry! If you’re looking for recipes for other important holidays and celebrations like Valentine’s Day and Independence Day, we’ve got you covered. We have many more affordable yet delicious seasonal recipes you can always check out.
Best Budget Seasonal Recipes For Thanksgiving
Thanksgiving Day is one of the biggest and most popular holiday celebrations in both the U.S. and Canada. It’s observed on the fourth Thursday of November every year, with its most important tradition being the iconic Thanksgiving dinner.
This holiday has a rich and long history. It goes all the way back to 1621, when the first English settlers shared a harvest feast with Native Americans. This feast was their way of celebrating the year’s bountiful harvests and many other blessings. Nowadays, the way people celebrate Thanksgiving is somewhat patterned after that historical harvest feast.
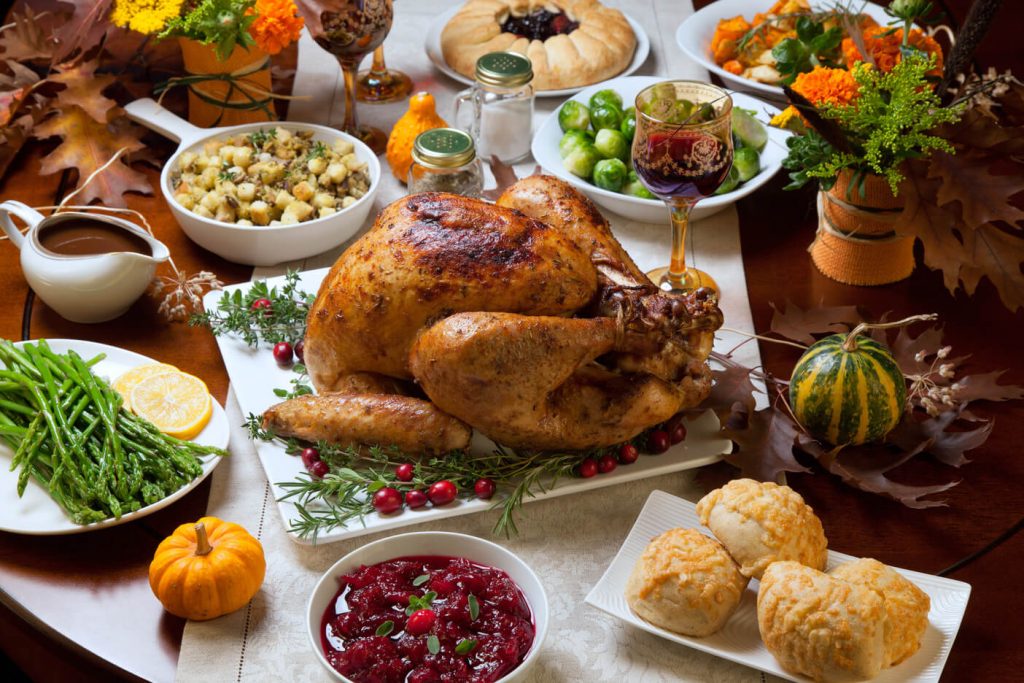
At present, Thanksgiving is one of the busiest days of the year as most Americans see this occasion as the perfect time to gather with family members. After all, what better way to catch up with loved ones than by sharing a Thanksgiving meal together. And no dinner is complete without staple Thanksgiving food like turkeys, bread stuffing, cranberry, pumpkin pies, and potatoes. So, with so many mouths to feed and so much food to cook, it’s clear why home cooks find this day both special and stressful.
But not to worry! We have two budget Thanksgiving recipes that both are easy to make and delicious to eat. Also, if you liked the recipes we included in this list, we still have more Thanksgiving dinner ideas you can try for this special occasion.
Delicious Thanksgiving Turkey
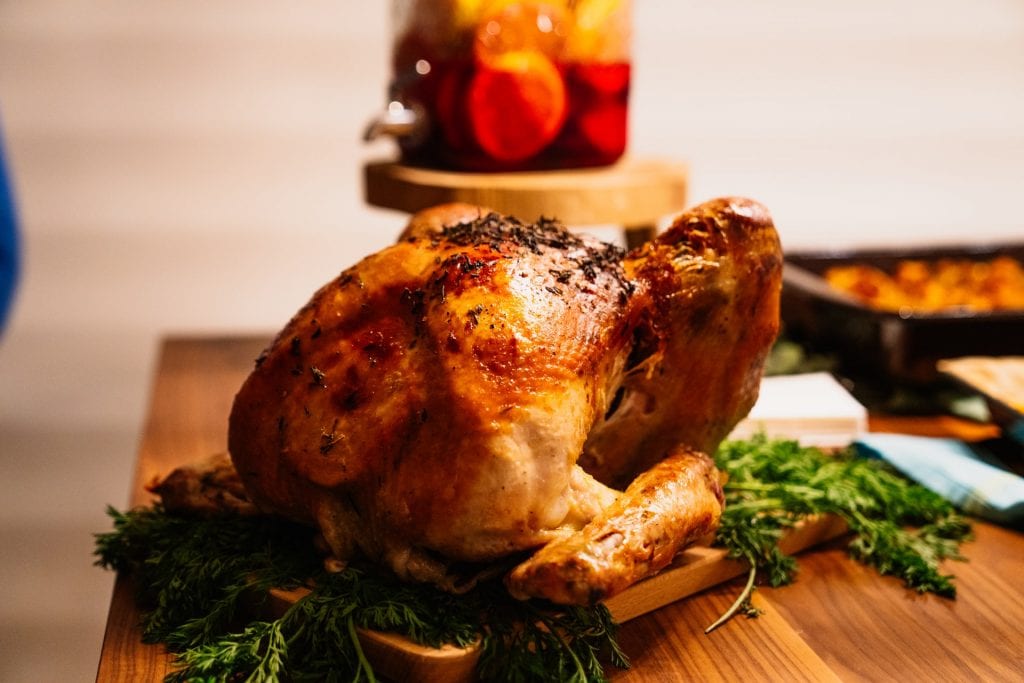
When someone says “turkey dish”, the first thing to probably pop into your head is Thanksgiving. Indeed, it isn’t really a Thanksgiving dinner if this stuffed poultry isn’t at the center of the dinner table. Fortunately, you can never go wrong with our Thanksgiving recipes. At least, not with our delicious Thanksgiving Turkey recipe. This scrumptious turkey is stuffed with orange slices, onions, carrots, celery stalks, and fresh herbs.
In true budget fashion, this turkey recipe doesn’t need many ingredients, much less expensive ones. The main ingredient you’ll be needing is a fresh, young turkey. But while its stuffing is relatively simple, it makes use of these ingredients’ various flavors to bring out a rich, palatable taste. Thanks to the orange slices, you’ll taste just the right hint of citrus when you cut up its tenderized meat. The handfuls of rosemary, thyme, and sage also pack an explosion of spices that’s sure to make this a family-favorite recipe.
Recipe for Inspiration: Delicious Thanksgiving Turkey
Baked Yams With Ginger-Molasses Butter

While staple Thanksgiving side dishes include Homemade Mashed Potatoes and Cornbread Stuffing, it’s good to switch up holiday meals every now and again. Our Baked Yams with Ginger-Molasses Butter recipe is not only delicious, it’s incredibly filling to eat too. Just one serving, and you’re sure to satisfy everyone’s hungry tummies.
This side dish recipe is easy to make and only needs a handful of ingredients. You’ll need 6 yams at most, while the rest are there to add flavor. You probably already have butter, molasses, and cinnamon in your pantry, after all. But make no mistake, this side dish will definitely leave loved ones feeling satisfied after just a couple of bites. While we say that it’s a side dish, you can also eat it as a main dish for dinner parties or other special occasions. Whatever the purpose, we’re sure that this side dish will soon become a staple Thanksgiving side dish for you and your loved ones to enjoy.
Recipe for Inspiration: Baked Yams With Ginger-Molasses Butter
Best Budget Seasonal Recipes For Christmas

It’s the most wonderful time of the year! We’re talking about the Christmas season, of course. People from all over the world celebrate this holiday, with each culture having its own tradition. However, some practices are the same for every country, one of which is the traditional Christmas dinner.
Christmas celebrates the birth of Christianity’s baby Jesus on December 25th every year. And although it’s originally a religious practice, many people, regardless of their beliefs, also observe this holiday. From giving gifts to decorating Christmas trees and even baking the best Christmas cookie recipes, there are many ways to celebrate this special occasion. And one of the most important Christmas traditions is Christmas dinner.
Some countries eat traditional Christmas dinner before the 25th, while others have it on the day itself. Whether it’s on Christmas eve or Christmas day, we have the best affordable Christmas recipes for you and loved ones to enjoy. If you liked the recipes we listed here, you can check out our other Christmas dinner ideas that’s sure to warm everyone’s hearts and tummies on this special day.
Heavenly Hickory Smoked Ham
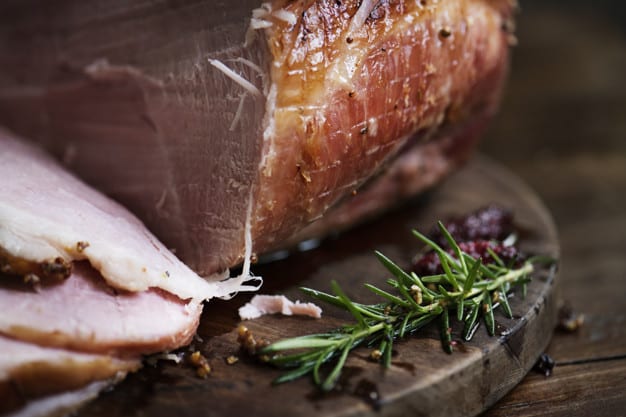
Turkeys are to Thanksgiving as smoked ham is to Christmas. Just a bite of our Heavenly Hickory Smoked Ham and you’ll be wishing it was Christmas day every day. This ham not only looks exquisite, it tastes wonderful too. In fact, it’s so heavenly, you wouldn’t believe it’s this easy and affordable to make.
This dish only needs one main ingredient: ham. The rest, from the BBQ sauce to the Worcestershire spray, are used for flavor. And in just under four hours, you’ll be serving a deliciously glazed spiral ham to friends and family!
Unlike other ham recipes, you’ll be using a grill instead of an oven to slowly cook this dish. Don’t worry, you can easily do this with a pellet grill or smoker. Plus, all your hard work will pay off when you finish cooking this delicious spiral ham! That’s because all those hours spent grilling the meat will leave it tender, succulent, and oozing with rich juices. Serve this scrumptious dish to friends and family on Christmas day and they’ll be wishing you were the cook for every holiday.
Recipe for Inspiration: Heavenly Hickory Smoked Ham
Perfect Eggnog

You’ll be making the best Christmas drinks with our perfect Eggnog recipe. Like gingerbread men and pudding, eggnog is a staple Christmas food that you can’t not make. This sweet, creamy eggnog drink is perfect for kicking off the day with a holiday spirit! Although this version is for adults only (because it has alcohol), it’s still a great drink to whip up when the holiday season comes around.
This eggnog recipe is incredibly easy to make. You’ll only need a few ingredients, like whipped cream, marshmallow, ice cream, eggs, and rum. With just a few easy steps, you’ll make your first batch of eggnog, good for serving up to 4 people!
You’re lucky this drink is easy to make because people will surely empty their glasses really quickly!
Recipe for Inspiration: Perfect Eggnog
Best Budget Seasonal Recipes For Halloween

Although Halloween is not recognized as an official holiday, many people, from kids to adults, still celebrate this special occasion on the 31st of October every year. After all, who doesn’t love dressing up as scary characters, trick-or-treating, or attending exciting Halloween parties? Besides costumes and scary movies, Halloween is also a big holiday for foodies and home cooks. Some parents take their time making creative Halloween treats, while those holding parties won’t allow the party food to not be Halloween-themed food.
If you’re holding a party and would love to make creative Halloween party food, we have affordable and easy Halloween food ideas for you. We listed two crafty Halloween recipes that’ll get anyone into the haunting spirit. If you liked those recipes, we have more Halloween recipes you can try for this spooky occasion.
Butterfinger Eyeballs

First up on this list of creative Halloween-themed food is our Butterfingers Eyeballs recipe. This Halloween treat is the perfect spooky snack that will have people shrieking with joy! Although they look like scary eyeballs, these treats are actually delicious Butterfinger cookies. They’re easy to prepare, and the first batch you make can have up to 30 pieces for people to enjoy.
This recipe needs only a few ingredients, and most (if not all) are easily available in many nearby stores. Although there are a handful of steps to follow in this recipe, asking friends or other family members will make the cooking experience even more fun. Those with hidden artistic talents will surely shine once they start designing the eyeballs using icing. Once done, make sure to store these cookies in the refrigerator so no sneaky hands can snatch any eyeballs before the guests arrive.
Recipe for Inspiration: Butterfingers Eyeballs
Halloween Crispy Marshmallow Ghosts

Our Halloween Crispy Marshmallow Ghosts are as delicious to eat as they are cute! Like the Butterfinger Eyeballs recipe, this Halloween-themed food is best made with the help of friends or family. Not only will you be shaping the ghosts’ crispy bodies, but you’ll also be decorating the ghosts’ scary faces. Their faces can be changed and drawn differently, depending on who’s designing it. One marshmallow ghost can look spooky, while the others can look like they’re enjoying the Halloween party as much as the others are.
The main ingredients you’ll need are candies, such as marshmallows and semi-sweet chocolate. The other ingredients include butter, sugar, vanilla, and egg white. Our recipe is easy to follow, thanks to its clear recipe instructions. We’re sure that you’ll be making these yummy ghost treats for the next Halloween celebrations to come.
Recipe for Inspiration: Halloween Crispy Marshmallow Ghosts
Best Budget Seasonal Recipes For Easter
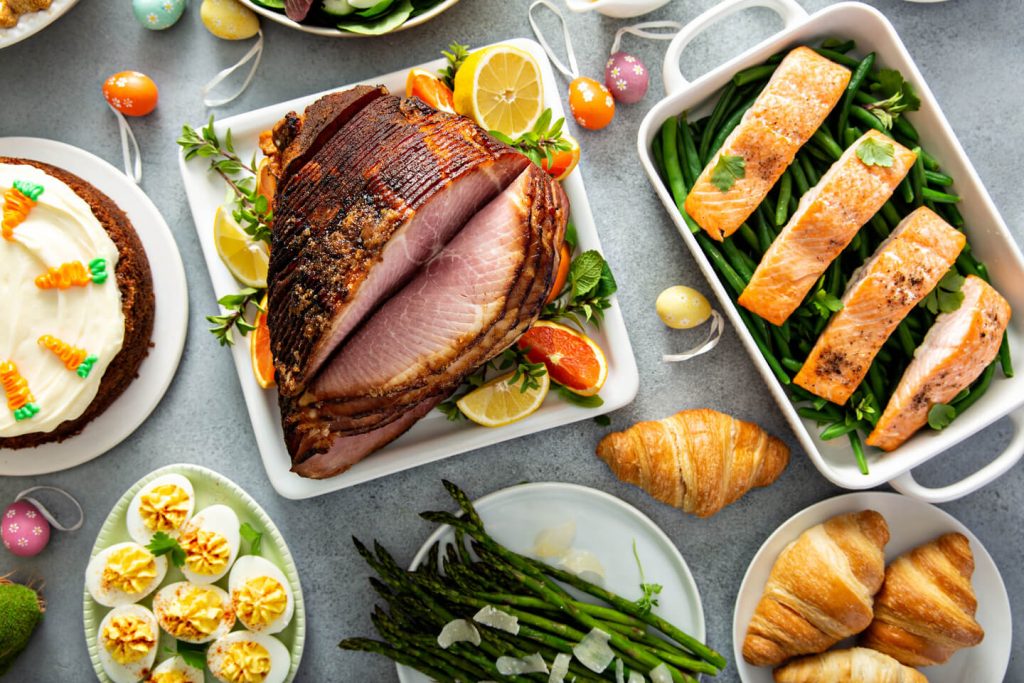
Like Christmas, Easter is a religious occasion that celebrates Jesus’ coming back to life. And like Christmas, many have come to celebrate Easter with traditions like egg decorating, egg hunting, and Easter bunnies. Because lent season (and fasting) ends with Easter Sunday, people have also built a tradition of eating Easter food when observing this holiday. While some browse through the Honey Baked Ham menu, we’ll show you two Easter meal ideas that are both affordable and delicious to make.
Easter Lemon Bundt Cake

Bundt cake is a signature Easter dessert, and our Easter Lemon Bundt Cake recipe is great for serving large groups of people. It may sound like a fancy meal, but this cake is actually affordable to make. Don’t worry if it’s your first time baking. Our recipe instructions are clear and easy to follow for those who want to try their hand at making this Easter dessert.
For such a large cake, it’s amazing how our recipe only needs a handful of ingredients. All of these are easy to find in nearby stores, if not already stored in your pantry. If you’re serving around 10 people for Easter Sunday, our soft and moist lemon Bundt cake is the answer to your budget. Its light, lemon zest taste is the perfect palate cleanser for the main dish whose recipe is listed below.
Recipe for Inspiration: Easter Lemon Bundt Cake
Easter Roast
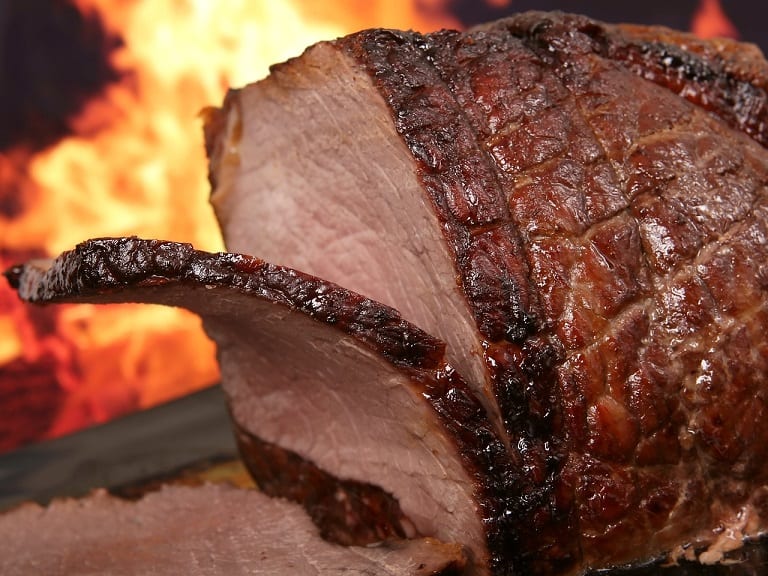
No Easter Sunday celebration is complete without a succulent roast! Our Easter Roast recipe is the perfect dish to serve large groups of hungry people. This thick slice of meat is hearty and filling to the stomach. Without this at your dinner table, it’s hard to say that tummies are really satisfied.
Out of all the Easter dishes, this is probably the dish where you’ll get the most out of your money. With just a cut of heavy chuck roast plus onion and mushroom soup, you’re ready to have a heavy dinner protein-rich dinner. It’s also easy to make. You may need to leave the roast to cook for 6 hours, but after that your roast is done cooking. If you want to add some color to this tender roast, you can always serve it alongside roasted vegetables.
Recipe for Inspiration: Easter Roast
Best Budget Seasonal Recipes For St. Patrick’s Day

Last but not the least, we have St. Patrick’s Day. Like Christmas and Easter, this special occasion is heavily associated with Christianity. Although it celebrates the patron saint of Ireland, St. Patrick, many countries like the U.S., Canada, and Australia also observe this special day. Although it’s generally stereotyped to be a drinking holiday, it’s more than that! Because of its Irish roots, this special occasion has also somewhat become a way for Irish people to celebrate their culture even though they live far away from their home country.
Asides from drinking green beer, people also eat traditional Irish food as part of St. Patrick’s Day traditions. There are even St. Patrick’s Day dessert recipes that color every dessert green! In this article, we listed two affordable St. Patrick’s Day recipes for you to cook and enjoy on March 17th every year. But if you happen to like the taste of Irish food, you can always check our other Irish recipes.
Mom’s Irish Soda Bread
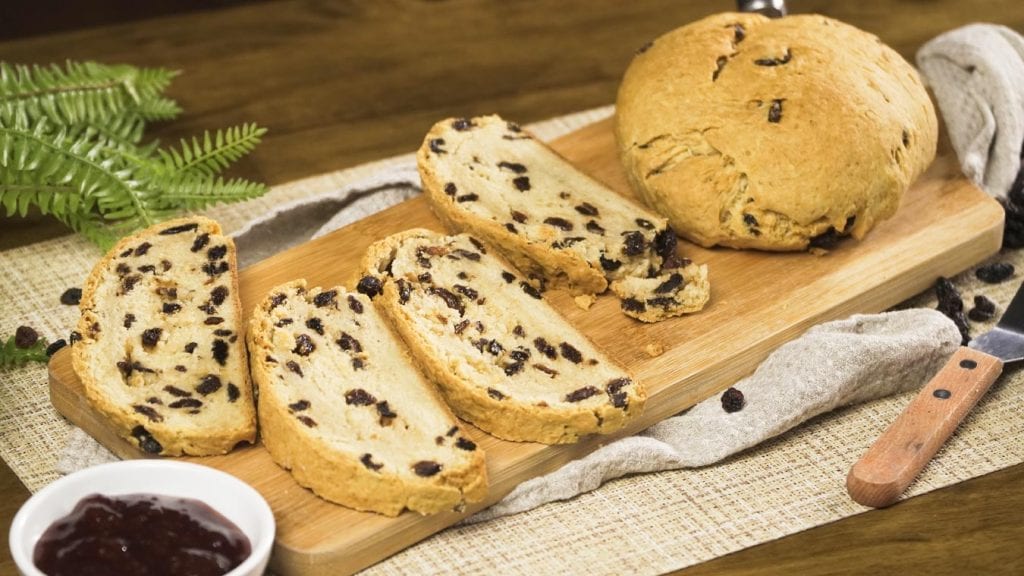
Soda Bread is one of the signature food at every St. Patrick’s Day celebration. This Irish bread is popular for its buttery and sweet taste. It’s so delicious, it can be enjoyed on its own without any spread or filling. While most people make this dish for St. Patrick’s Day, you can make soda bread using our Irish Soda Bread recipe any day, even if there’s no special occasion. This bread is great for breakfast or snacks too.
This recipe uses only a few staple ingredients one would need if they were making bread. You will probably already have flour, baking soda, baking powder, salt, sugar, butter, and milk stored in the pantry. The other ingredients, like raisins and apple cider vinegar, are easy to find in grocery stores and are cheap to buy too. Just follow the steps listed in the recipe instructions, and you can make up to 12 pieces of Irish Soda Bread for St. Patrick’s Day!
Recipe for Inspiration: Mom’s Irish Soda Bread
Chilly Leprechaun

If Irish soda bread can’t get you into the holiday spirit, our Chilly Leprechaun recipe will! With cold espresso and Irish whiskey, this cool Irish drink will definitely give you an energy boost. Our Chilly Leprechaun is quick and easy to make. All you need to do is blend all the ingredients together until they’re smooth and mixed enough to drink.
Asides from the ingredients mentioned, you’ll need Irish cream, vanilla ice cream, syrup, and ice. Simple, right? However, don’t underestimate this drink. Just one sip and you’ll be dancing your pants off like a leprechaun! This Irish drink is definitely a must-have when celebrating St. Patrick’s Day.
Recipe for Inspiration: Chilly Leprechaun
Conclusion
Our budget seasonal recipes show that you can have both a delicious and filling meal with just a few ingredients. Whether it’s Thanksgiving or St. Patrick’s Day, we have the perfect budget recipes for you all year-round.
Was this page helpful?
Read Next: 40 Aphrodisiac Foods To Enhance Your Libido
Naomi Blue
Naomi is a writer, editor, and manga enthusiast. She has written for various websites, events, and ad commercials. She is also an avid fan of street food and food history. She’s currently in her Japanese and Indonesian food phase and is interested in exploring Vietnamese cuisine next.
Related Articles